Have you ever dreamed of cruising down the streets on your very own electric skateboard, but were taken aback by the steep prices? What if we told you that with some basic tools, a dash of DIY spirit, and a sprinkle of patience, you could assemble your own low-cost electric skateboard? Yes, that’s right! This article will guide you through the exhilarating journey of building a cheap electric skateboard from scratch. You’ll be zipping around town in no time!
What we’ll cover:
- Necessary Components Collection
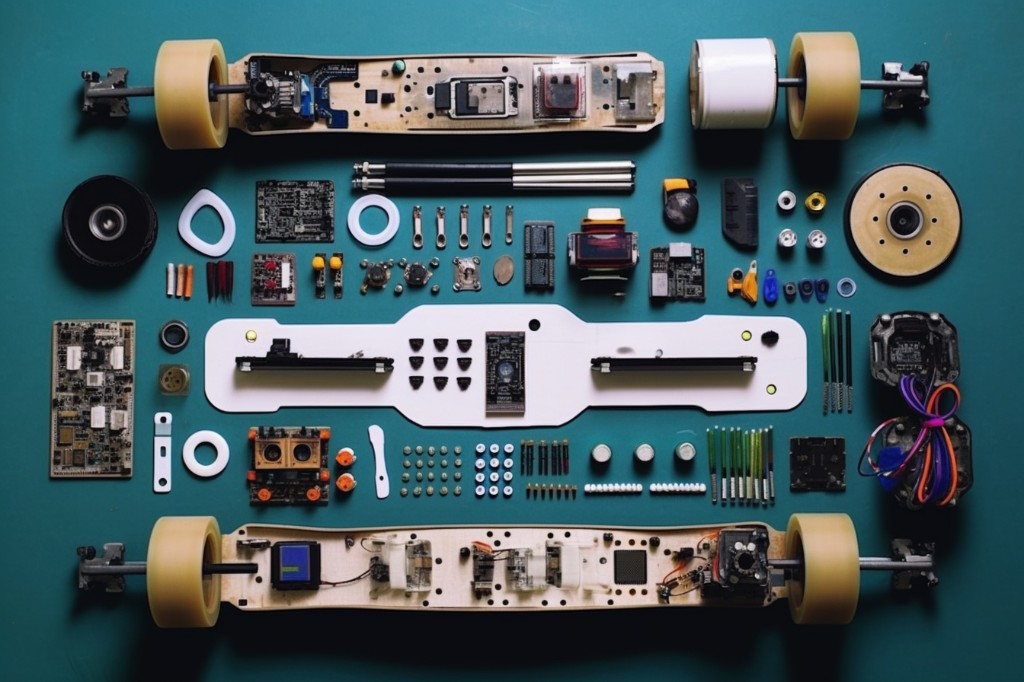
- Electric Skateboard Anatomy
- Step-by-step Assembly Guide
- DIY Electric Skateboard Kit Insights
- Enhancing Your E-Skateboard: Pro Tips
- Testing and Usage Guidelines
- E-Skateboard Customization Ideas
Ready to embrace the thrill of DIY and transform your commute? Let’s jump right in and start building your dream ride!
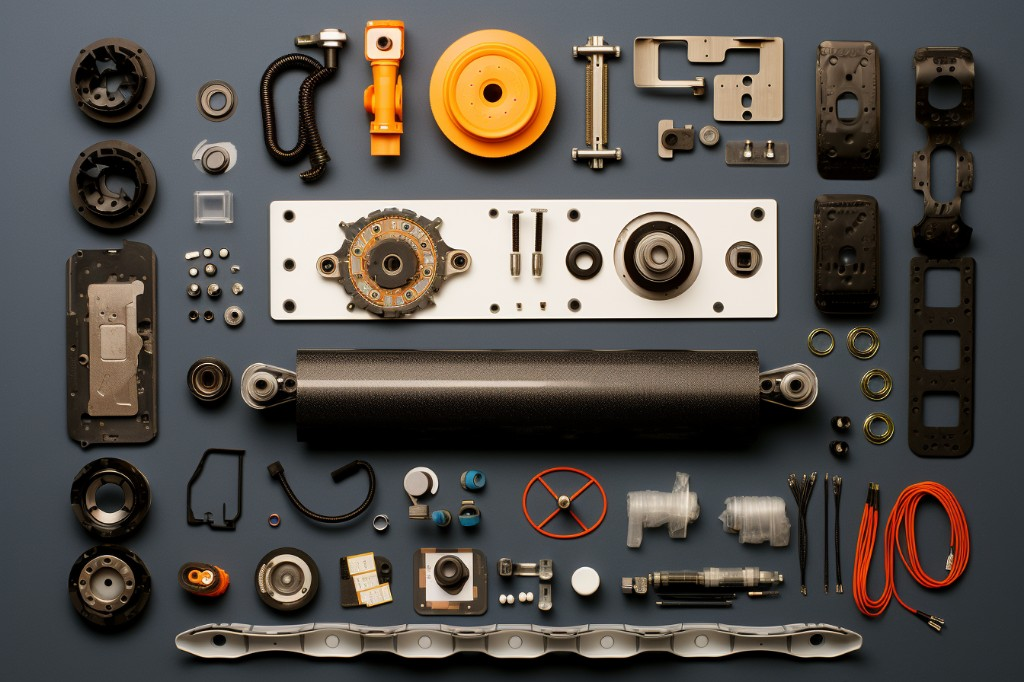
Gathering Necessary Components
When you embark on a journey to build your own DIY electric skateboard, the first step involves collecting all the necessary components. A few crucial parts are needed to transform a simple board into a fast and efficient electric skateboard. Remember, every component plays a significant role in your e-skateboard’s performance, so choose wisely!
Identifying Suitable Skateboard Deck
The foundation of your electric skateboard is the deck. Your riding experience largely depends on its size, shape, and material. For an e-skateboard, it’s generally better to go with a longboard deck. The additional length provides more space to mount the battery and other electronics, not to mention it offers a more stable ride at high speeds.
When choosing a deck, consider factors like flex, concave shape, and wheel cutouts. A medium-flex deck can provide comfortable rides by absorbing road vibrations, while a deeper concave shape ensures better foot grip. Wheel cutouts prevent wheel bites during sharp turns.
Selecting Appropriate Trucks and Wheels
The trucks and wheels of your electric skateboard greatly influence its maneuverability and speed. Trucks connect the wheels to the deck and control the board’s steering. Look for wide trucks (around 10 inches) to ensure stability at high speeds.
As for wheels, larger ones will give your board higher top speed but slower acceleration, while smaller ones do the exact opposite. If you plan to ride on rough surfaces or over cracks and rocks, opt for bigger and softer wheels for a smoother ride.
Choosing the Right Motor for Your Electric Skateboard
The motor is the heart of your electric skateboard. It determines how fast you can go and how steep hills you can climb. Hub motors are an excellent choice for their simplicity and stealthiness. They’re built directly into the wheels, which eliminates the need for belts or chains.
But remember, hub motors can make the ride a bit rougher as they replace some of the urethane on the wheel with hard metal. If comfort is your priority, you might want to consider a belt-drive motor instead.

Understanding Electronic Speed Control (ESC)
The Electronic Speed Control, or ESC, is the brain of your electric skateboard. It controls the speed of your board by regulating the power from the battery to the motor. When you push the throttle on your remote, the ESC decides how much power to send to the motor.
Choosing an ESC might seem complicated with all the technical specifications, but it doesn’t have to be. Simply match the voltage of your ESC with that of your battery and ensure it can handle the current your motor will draw. It’s also wise to choose an ESC specifically designed for electric skateboards as they come with smooth acceleration and braking profiles for a safer ride.
Deciding on a Suitable Battery
The battery is essentially the fuel tank of your electric skateboard. Lithium-ion batteries are popular in e-skateboards due to their high energy density and long lifespan. When choosing a battery, pay attention to its voltage and capacity. The voltage should match your ESC and motor, while the capacity (measured in Ah) determines how far you can ride on a single charge.
Essential Transmitters and Receivers
Last but not least, you’ll need a transmitter (remote control) and a receiver. These two components allow you to control your board’s speed and direction wirelessly. Look for a remote that fits comfortably in your hand, has a reliable connection with the receiver, and displays important information like speed and battery level.
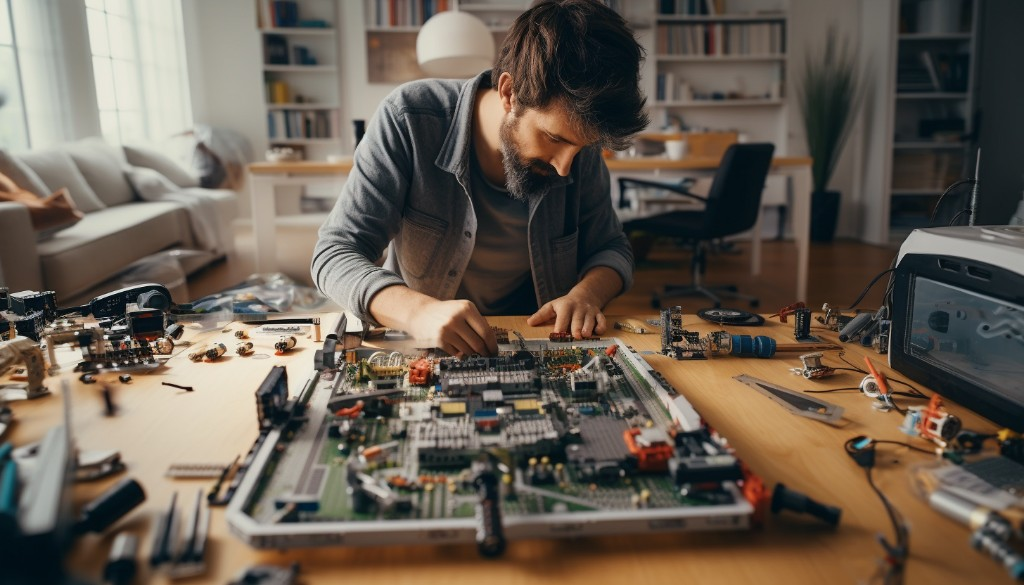
Building a DIY electric skateboard can be a rewarding project. Not only will you learn a lot about electronics and mechanics along the way, but you’ll also end up with a unique board that’s tailored to your needs and preferences. Just make sure to take your time in gathering the right components and understand their role in the overall performance of your board.
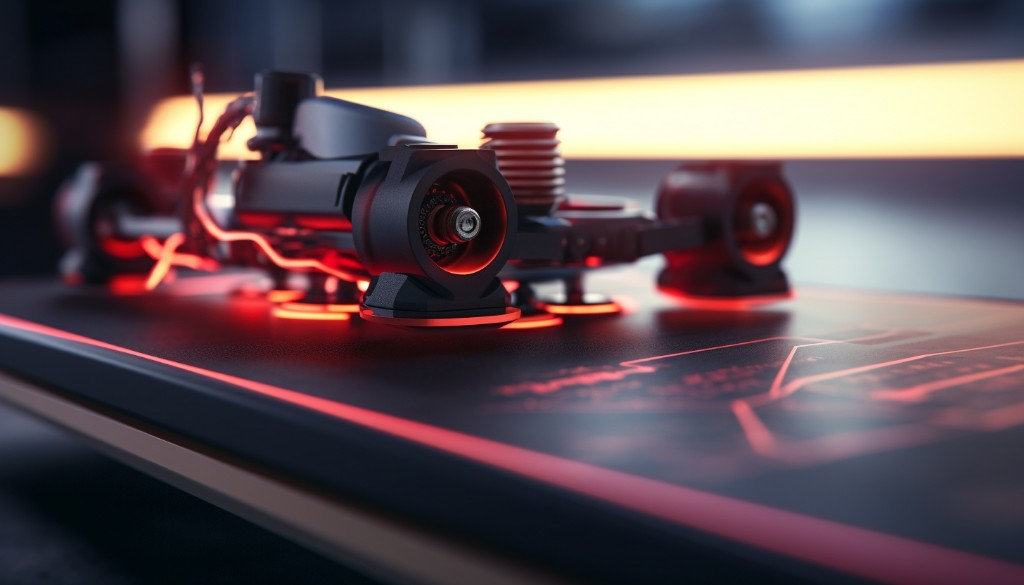
Detailed Guide to Assembling Your Electric Skateboard
Once you have all the components ready, it’s time to start the assembly process of your DIY electric skateboard. This step-by-step guide will walk you through each stage, making sure you’re on the right track.
Step #1: Attaching Pulleys
Begin with attaching pulleys to your wheels. These pulleys will eventually link up with the motor to drive your board. You’ll want to ensure they’re securely fastened to avoid any slippage when you’re cruising down the street. Typically, a good set of pulleys will come with spacers and bolts for easy installation.
Step #2: Mounting the Motor
Next comes the task of mounting the motor onto your skateboard. For this, you’ll need motor mounts, which are metal pieces designed to secure the motor to the skateboard. Align the motor with the mounts and then screw it in tightly. It’s important to remember that the motor mounts should be sturdy and high-quality to hold up under the weight and power of the motor.
Step #3: Setting Up Electronics
Now it’s time to wire everything together. Your DIY electric skateboard will require a power source (usually a battery), a speed controller, and a receiver for the remote control. Start by connecting the battery to the speed controller, then connect the speed controller to the motor. You’ll also need to connect the receiver for the remote control to the speed controller. Be careful to match voltage levels between components to avoid any electrical issues.
Considerations for DIY Electric Skateboard Kits
Building an electric skateboard from scratch can be a fun project, but it can also be complex and time-consuming. To simplify things, you might want to consider using a DIY electric skateboard kit.
Advantages of Using DIY Kits
A DIY kit comes with all the necessary components for building an electric skateboard. These kits can be a great way to save time and avoid the hassle of sourcing individual parts. Plus, the components in a DIY kit are designed to work together, so you don’t have to worry about compatibility issues. They also often come with detailed instructions, which can make the assembly process much easier, especially for beginners.
Factors to Consider When Buying a DIY Kit
When choosing a skateboard kit, there are a few factors to consider. First, look at the cost. While a DIY kit might be more expensive upfront than buying individual parts, it can save you time and potential headaches in the long run. Next, consider the quality of the components. Make sure the kit includes high-quality parts that will last. Finally, check that the components in the kit are compatible with each other and with any additional parts you plan to add.
Remember, building a DIY electric skateboard can be a fun and rewarding project. Whether you choose to source your own parts or go with a DIY kit, you’ll end up with a unique board that’s customized to your preferences. So, grab your tools and get started on this exciting DIY adventure!
Tips for Enhancing Your DIY Electric Skateboard
Building a DIY electric skateboard can be a fun project, but the real thrill lies in personalizing and enhancing your board to suit your style and needs. Like a chef adding spices to a recipe, tweaking your electric skateboard adds an element of individuality and performance boost.
Suggested Improvements for Your Skateboard
Firstly, upgrading the battery can significantly improve the board’s range and speed. Using a high-quality lithium-ion battery instead of a standard one can give your board extra mileage, keeping you on the road longer.
Next, consider the motor. Upgrading to a more powerful motor can increase the top speed of your skateboard, giving you an adrenaline-filled ride. However, remember that a more powerful motor also means more power consumption, so balance this upgrade with your battery capacity.
The wheels are another area where you can make enhancements. Larger wheels can provide a smoother ride over rough terrain, while smaller wheels offer more control and precision. The choice of wheels will depend on where you plan to use your skateboard most often.
Protecting the Batteries
One of the most crucial components of any DIY electric skateboard is the battery. As you’ll be riding outdoors, it’s vital to protect your lithium-ion battery from elements such as water and dust. A well-designed battery enclosure can provide this protection while also adding an aesthetic touch to your board.
Additionally, a battery management system (BMS) can help prolong your battery’s life by preventing overcharging and deep discharging. A BMS also balances the individual cells in the battery pack, ensuring that they all discharge and charge at the same rate. This balance is critical in maintaining the health and longevity of your lithium-ion battery.
Testing and Using Your DIY Electric Skateboard

After you’ve put together your DIY electric skateboard, the next step is to test and use it. However, this isn’t as simple as hopping on and zooming off. To ensure safety and optimal performance, you need to take some precautions.
How to Test Your Assembled Electric Skateboard
Before riding your electric skateboard, it’s crucial to test it. Start by checking all the components for tightness and correct assembly. Then, without standing on the board, use the remote to slowly accelerate the board forward and then apply the brakes. This test allows you to ensure that both the acceleration and braking mechanisms are functioning correctly.
Next, stand on the board but keep one foot on the ground for stability. Slowly accelerate and brake again to feel how the board responds with weight on it. Once you’re comfortable with the board’s response, it’s time for the final test – a slow ride. Start with a low speed and gradually increase as you gain confidence and understanding of your DIY electric skateboard’s performance.
Safety Precautions When Using Your Electric Skateboard
Safety should always be a top priority when using your DIY electric skateboard. Always wear a helmet and consider additional safety gear like knee and elbow pads, especially if you’re new to skateboarding or if you’re riding at high speeds.
Be aware of your surroundings when riding. Keep a safe distance from pedestrians, cars, and other obstacles. Use your board’s speed settings wisely – start with lower speeds until you’re comfortable and only then consider higher speeds.
Remember, building and using a DIY electric skateboard should be fun and rewarding. By following these tips and suggestions, you can enhance your board’s performance and enjoy a safe, exciting ride.
Customizing Your DIY Electric Skateboard
When you pour your blood, sweat, and tears into creating a DIY electric skateboard, you want it to be a reflection of your personality, and not just another e-skateboard rolling down the street. The beauty of building your own board is that it’s a blank canvas. You can customize it to your heart’s content, adding personal touches that make it uniquely yours. Whether you want to personalize the deck or upgrade the wheels and trucks for a smoother ride, there are plenty of ways to tweak your electric skateboard to match your style and riding needs.
Ideas for Personalizing Your Skateboard Deck
Your skateboard deck is like a personal billboard. It’s a place where you can showcase your style, personality, and creativity. Here are some ideas to help you make your mark:
- Painting or Stickers: A splash of color or an array of stickers can instantly add character to your skateboard. You could paint a mural, create a geometric design, or stick decals of your favorite bands or brands. The possibilities are only limited by your imagination.
- Grip Tape Art: If you’re a bit of an artist, why not use grip tape as your canvas? Cut out patterns or shapes from different colored tapes and stick them on the deck to create a unique piece of grip tape art.
- Wood Burning: For a more rustic look, try wood burning. It’s a technique where you use a heated tool to burn designs into the wood of the deck. It’s a bit more challenging, but the results can be stunning.
- Using Different Materials: Who says a skateboard deck has to be made of wood? If you’re feeling adventurous, you could try using other materials like bamboo, carbon fiber, or even recycled plastic. Each material will give your board a different look and feel.
Remember, personalizing your deck is all about expressing yourself. So don’t be afraid to think outside the box and create something that truly represents you.
Suggestions for Upgrading Your Skateboard’s Wheels/Trucks
While personalizing your deck adds style, upgrading your wheels and trucks can significantly improve the performance of your electric skateboard. Here are some upgrades to consider:
- High-Quality Wheels: Upgrading to high-quality wheels can provide a smoother and faster ride. Look for wheels with a high durometer rating for speed and durability, and a larger diameter for stability at high speeds.
- Custom Trucks: Swapping out your standard trucks for custom ones can drastically improve your board’s handling and maneuverability. Consider trucks with a wider hanger for better control or ones with a lower kingpin angle for stability during downhill rides.
- Precision Bearings: Investing in precision bearings can make a noticeable difference in your board’s performance. They reduce friction and allow for smoother and faster rides.
- Shock Pads: Shock pads are thin rubber pieces that go between your trucks and the deck. They absorb some of the vibrations from riding, making for a more comfortable ride.
Just like with the deck, don’t be afraid to experiment with different wheels, trucks, and other components until you find what works best for you. After all, building and customizing your DIY electric skateboard is about creating a ride that fits your unique style and riding needs.
Closing Thoughts
Building a cheap electric skateboard from scratch can be an engaging and satisfying project, requiring you to gather necessary components and understand the basic anatomy of an electric skateboard. The process of assembly, guided by detailed instructions, can be an enlightening learning experience. Furthermore, DIY electric skateboard kits and customization options allow for a personalized touch, adding value beyond mere cost savings. As you test and use your self-built skateboard, the thrill of riding a device crafted by your own hands will surely amplify the joy of every glide. Remember, the significance of this project extends beyond creating an affordable mode of transportation — it embodies the spirit of innovation, creativity, and self-reliance.
Frequently Asked Questions
What is the best motor for a DIY electric skateboard?
The best motor for a DIY electric skateboard depends on several factors including your weight, desired speed, and terrain type. However, a brushless outrunner motor is commonly used due to its efficiency and power.
Can I use any skateboard deck to build an electric skateboard?
Yes, theoretically you can use any skateboard deck to build an electric skateboard. However, it’s important to ensure the deck is sturdy enough to handle the added weight of the motor and battery.
How can I enhance the performance of my DIY electric skateboard?
Enhancing the performance of your DIY electric skateboard can be achieved by using high-quality components, regular maintenance, and customizing it to fit your riding style and terrain.
Is it cheaper to build your own electric skateboard?
Yes, generally it is cheaper to build your own electric skateboard as you can control the cost of components. However, the cost can vary depending on the quality of parts used.
What are some safety precautions when using a DIY electric skateboard?
Safety precautions when using a DIY electric skateboard include wearing protective gear such as a helmet and knee pads, regularly checking and maintaining your board’s components, and riding responsibly by adhering to local laws and regulations.